
Инструкция
Manual Root Xiaomi Mi 10T Lite
Описание
Preparatory process.
- Copy all photos, music and other data stored in the device memory to a PC or memory card, as they will be deleted later.
- If the bootloader on your device is locked, then unlock it - HOW TO UNLOCK THE LOCKER ON XIAOMI.
- Download the archive with the necessary set of tools to your computer - gauguin.zip
- Download Magisk.zip archive to your computer.
- Download and install the drivers for your smartphone on your computer - Xiaomi Mi 10T Lite Driver.zip
- The first thing you should do is unlock the bootloader according to the instructions in the second step of the preparatory process.
- On the phone go to Settings - About the phone - look for MIUI version and press it 8 times. A popup message should appear telling you that you are now a developer. If you have done this before, a message will appear telling you that you are now a developer and you should not tap on the MIUI version anymore.
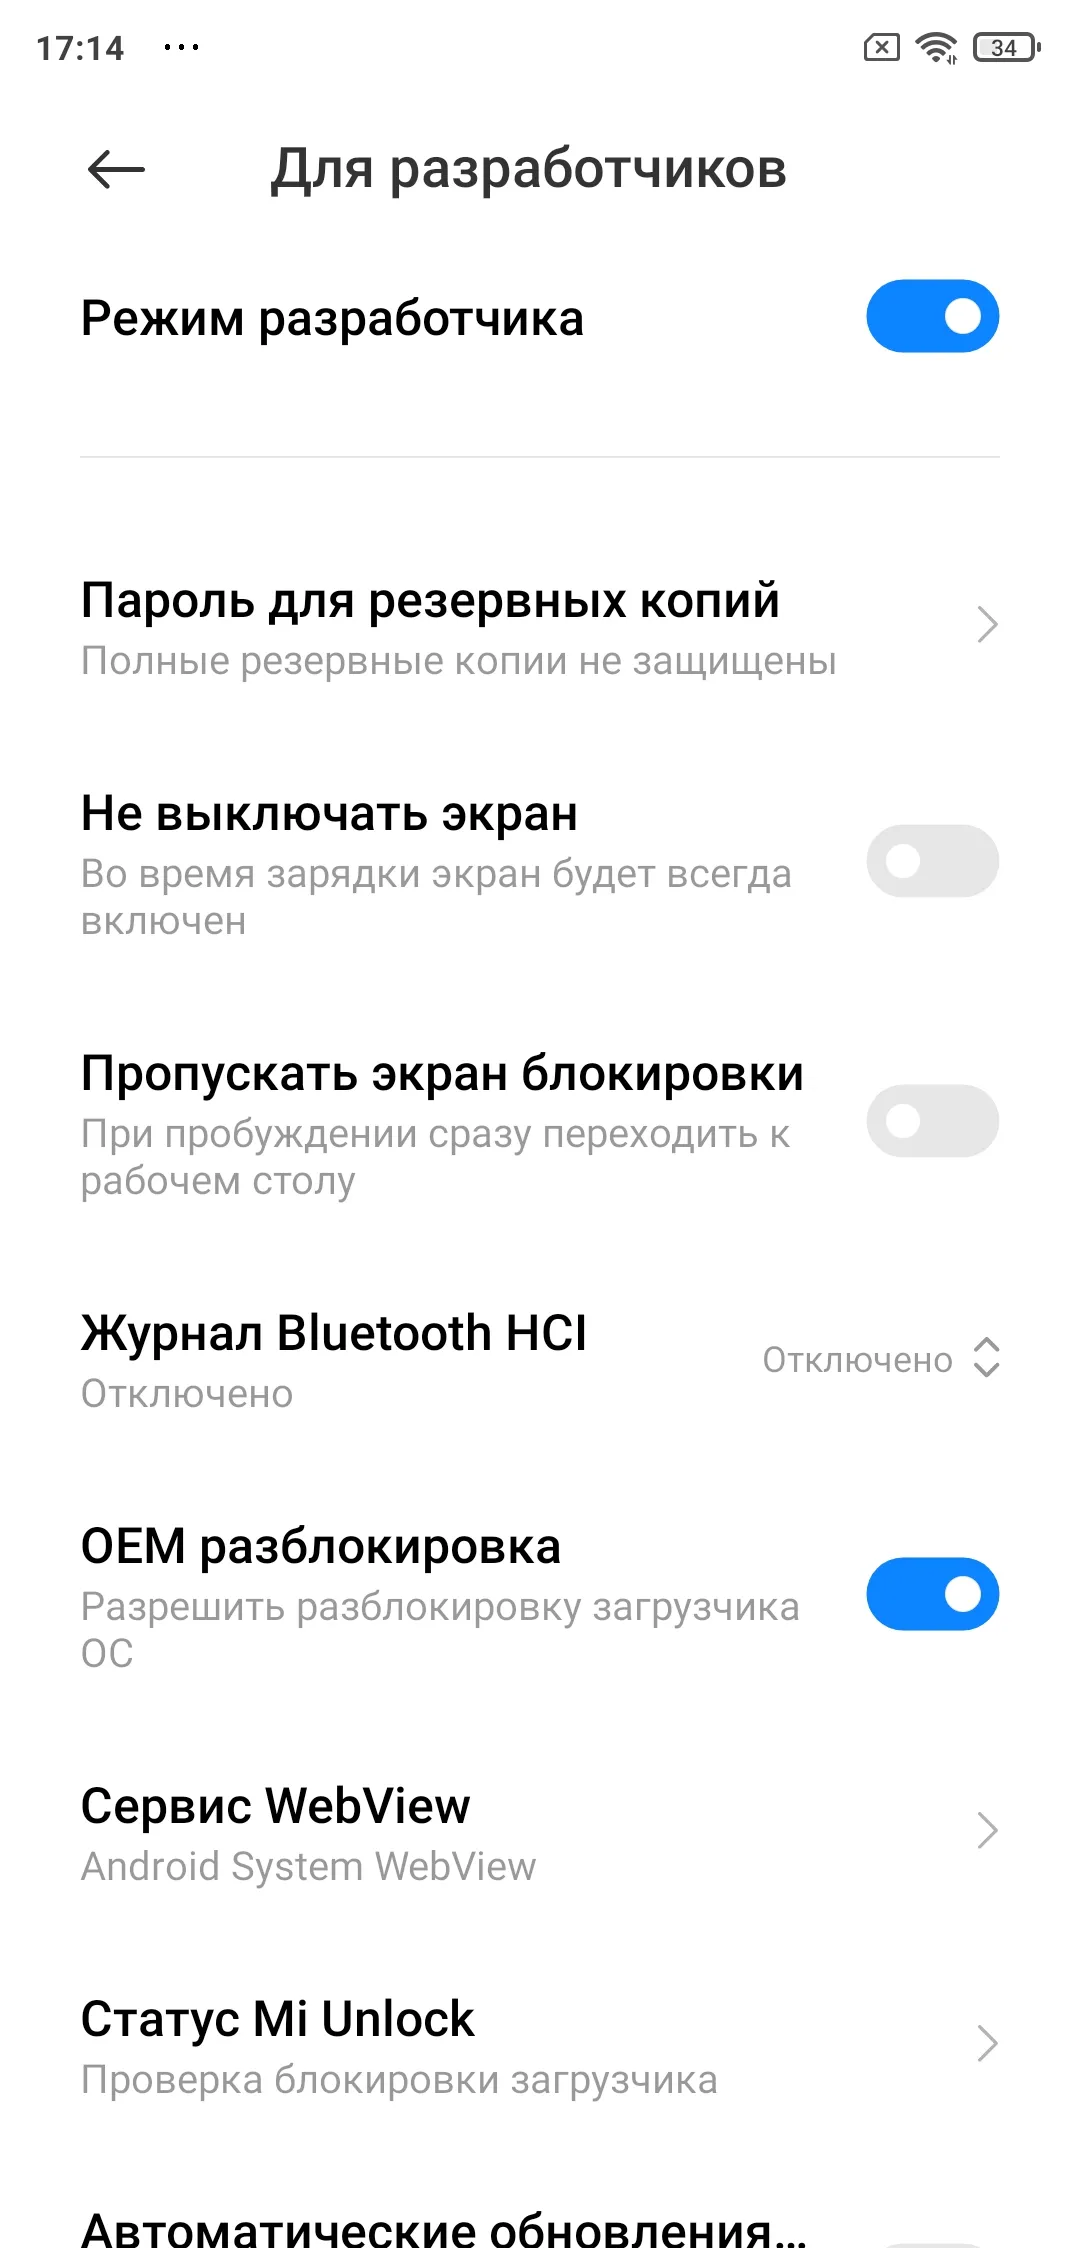
- Go to Settings - Advanced - Developers and enable "OEM Unlock" as shown in the screenshot below.
- In the menu Developers activate the item "Debugging via USB".
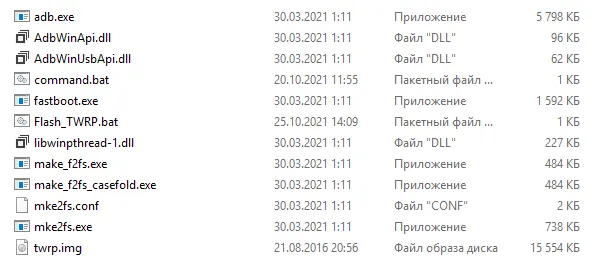
- On your PC, create a folder named "adb" in the root directory of the local drive C and copy archive gauguin.zip files for your device (point 3 of the preparatory process), extract the files from the archive, you should see what you see in the screenshot below.
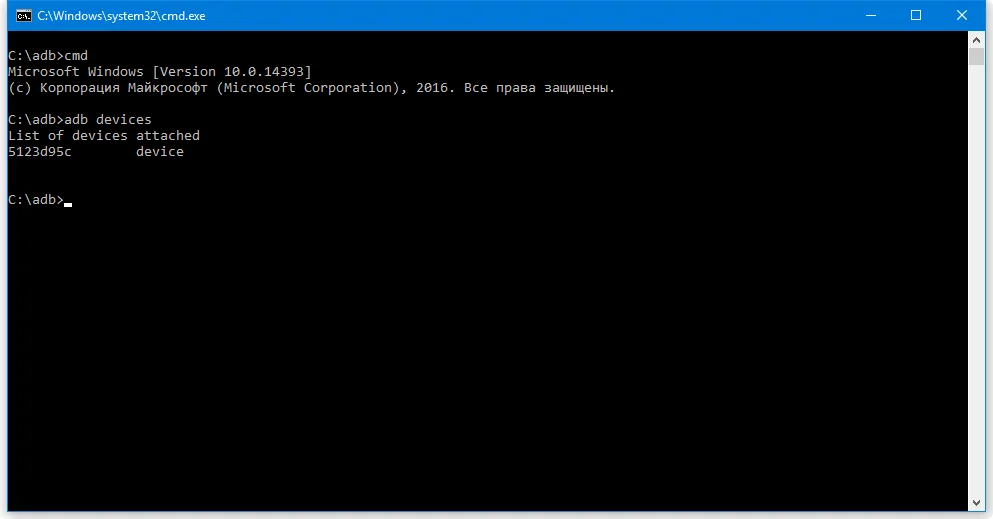
- Connect the smartphone to the PC with the USB cable, go to the folder with all the files from the previous point and run the command file.bat file, then enter the command:
This will check if the device is correctly connected to the computeradb devices - On your smartphone you need to switch to Fastboot mode, and you can do this in two ways:
Option 1.
Enter the command:
and wait for the device to reboot and automatically enter Fastboot mode.adb reboot bootloader
Option 2.
Turn off the smartphone completely. Press and hold the two "power" and "volume down" buttons at the same time. Fastboot and the company logo should appear on the screen. - Go back to your PC, connect the device via USB (if it was disconnected from the PC), in the folder with all the files find and run Flash_TWRP.bat, which will automatically install the TWRP custom recovers.
- After installing the custom recovers, the device should automatically boot into them (TWRP). If this does not happen, turn off the smartphone and simultaneously press and hold the "power" and "volume up" buttons until you enter the recovery mode.
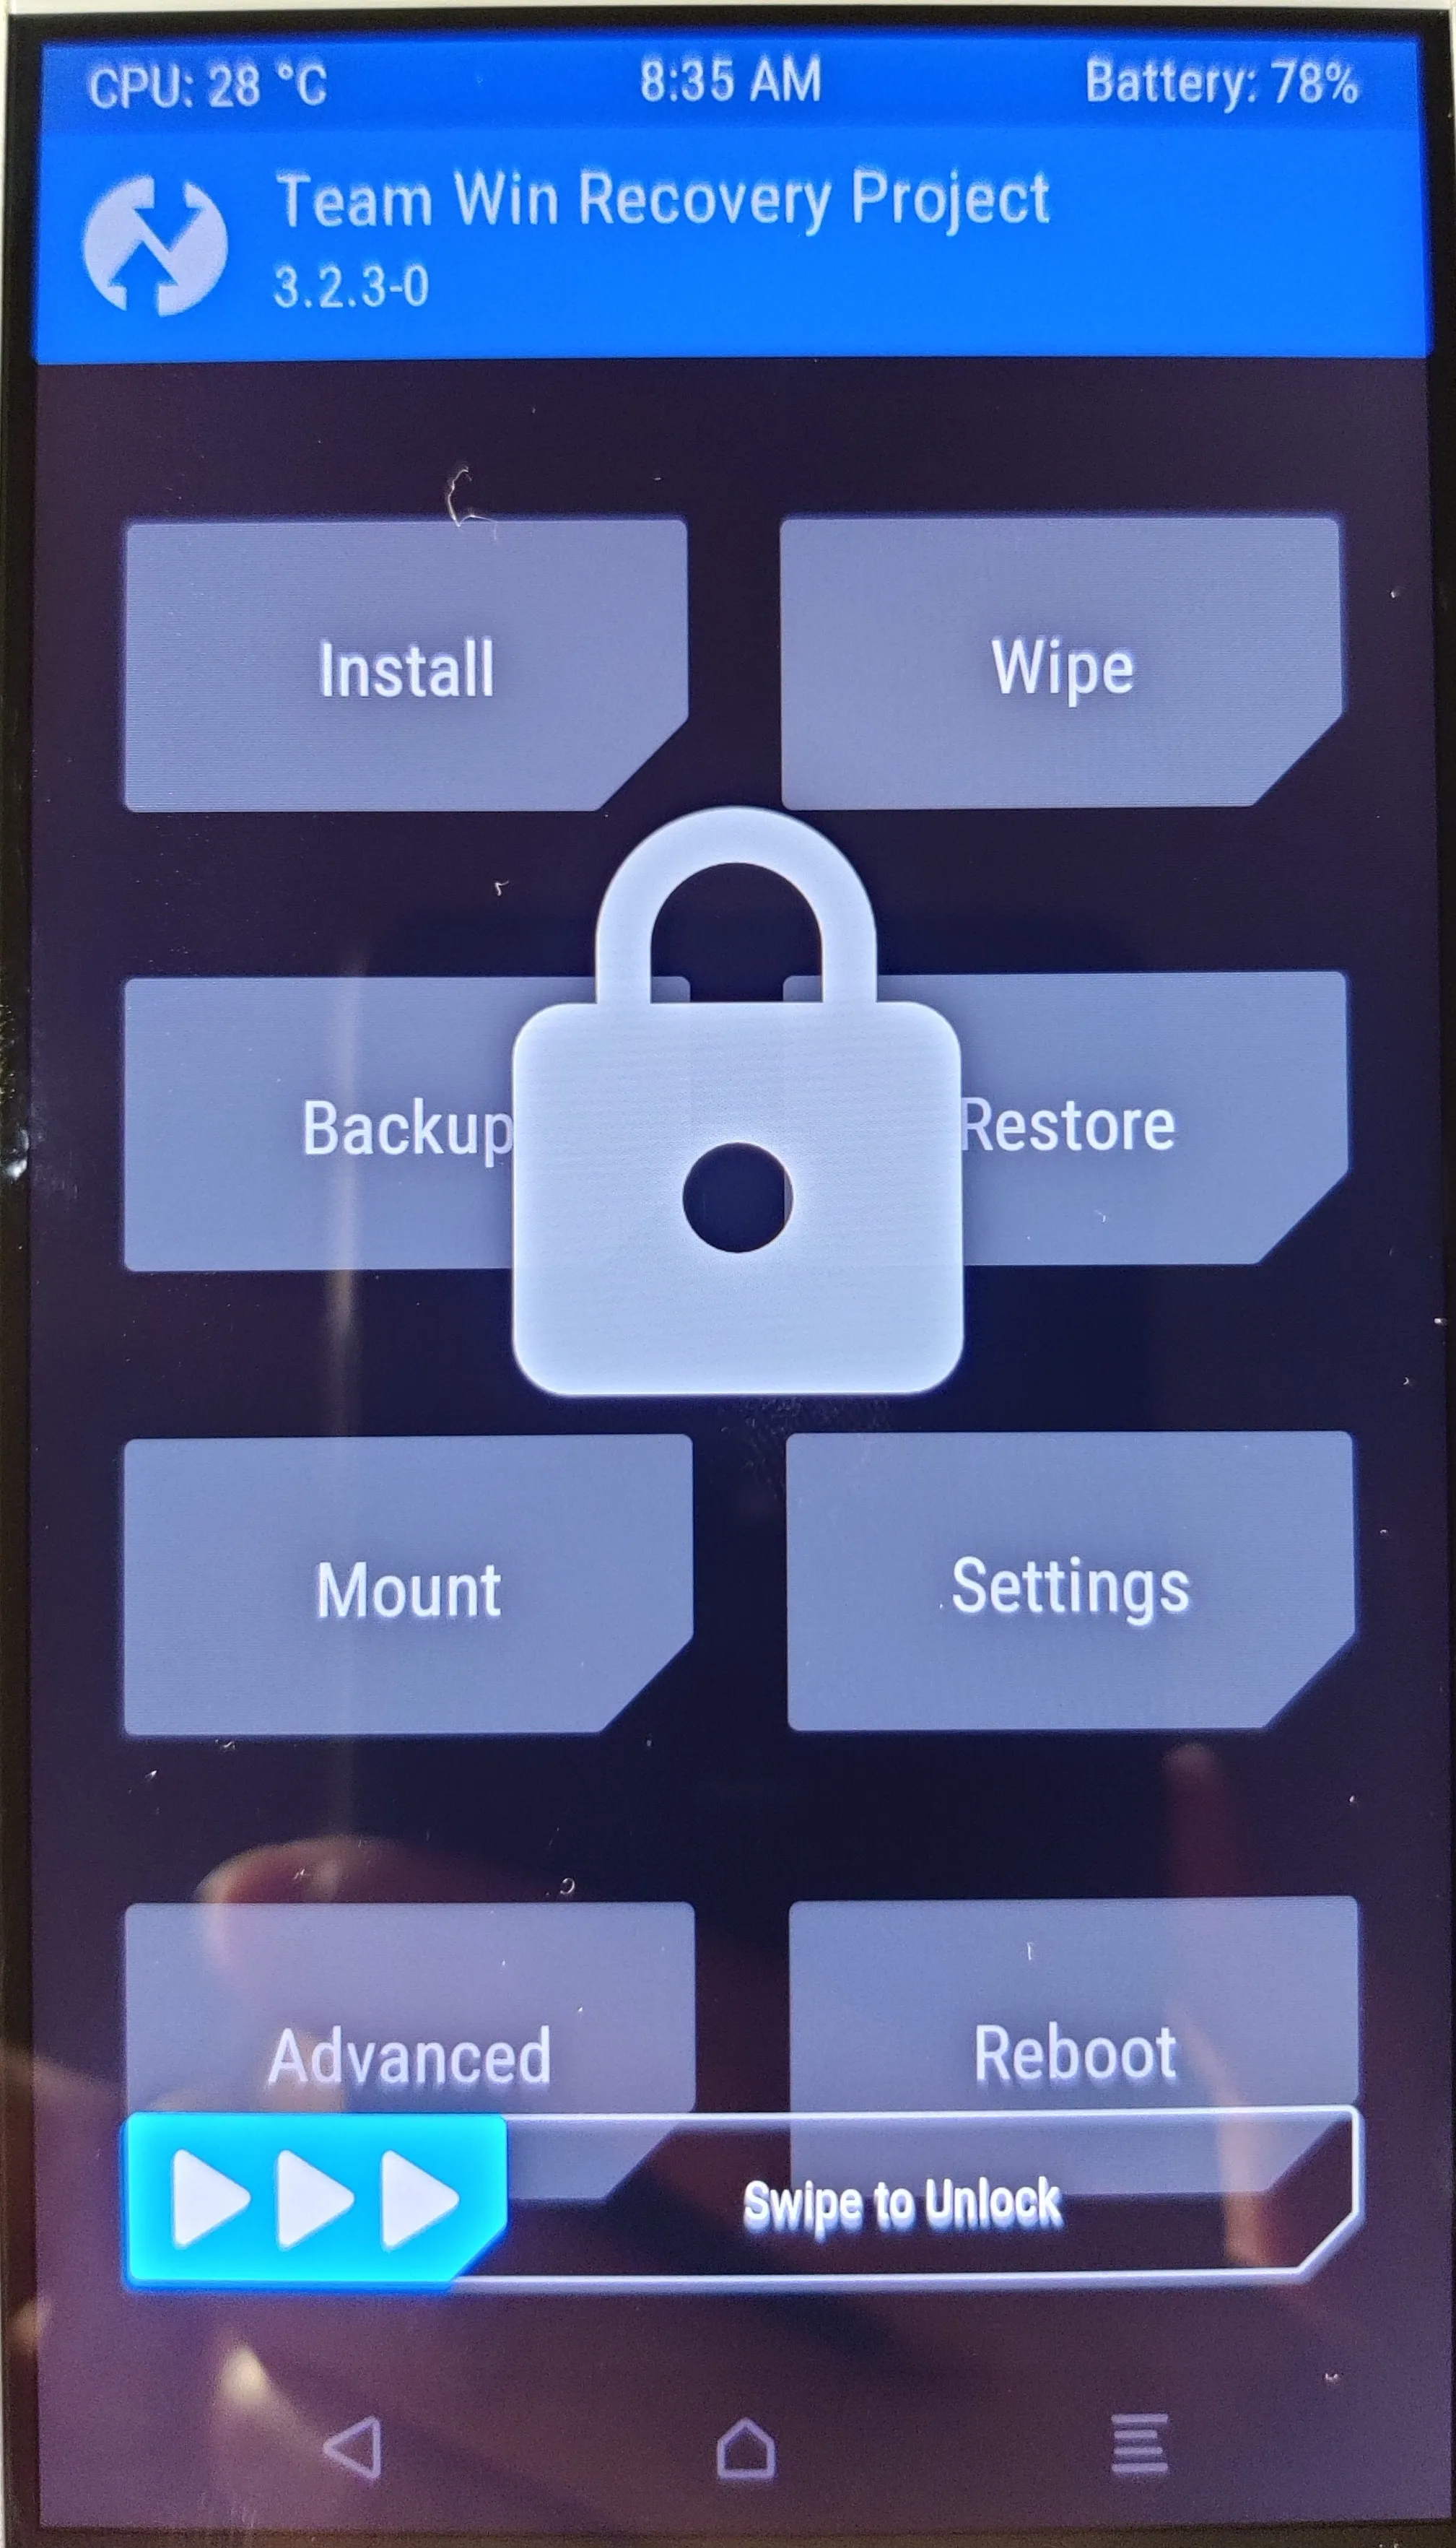
- After booting into TWRP, you must swipe from left to right to unlock the device.
- To install Magisk correctly, it is necessary to clear the internal memory of the device. Remember that all data will be deleted and if you didn't read the instructions carefully, pay attention to the first point of the preparatory process.
- Check Wipe - Format Data - In the window that appears, type "yes" and click on the checkbox, thus confirming your action.
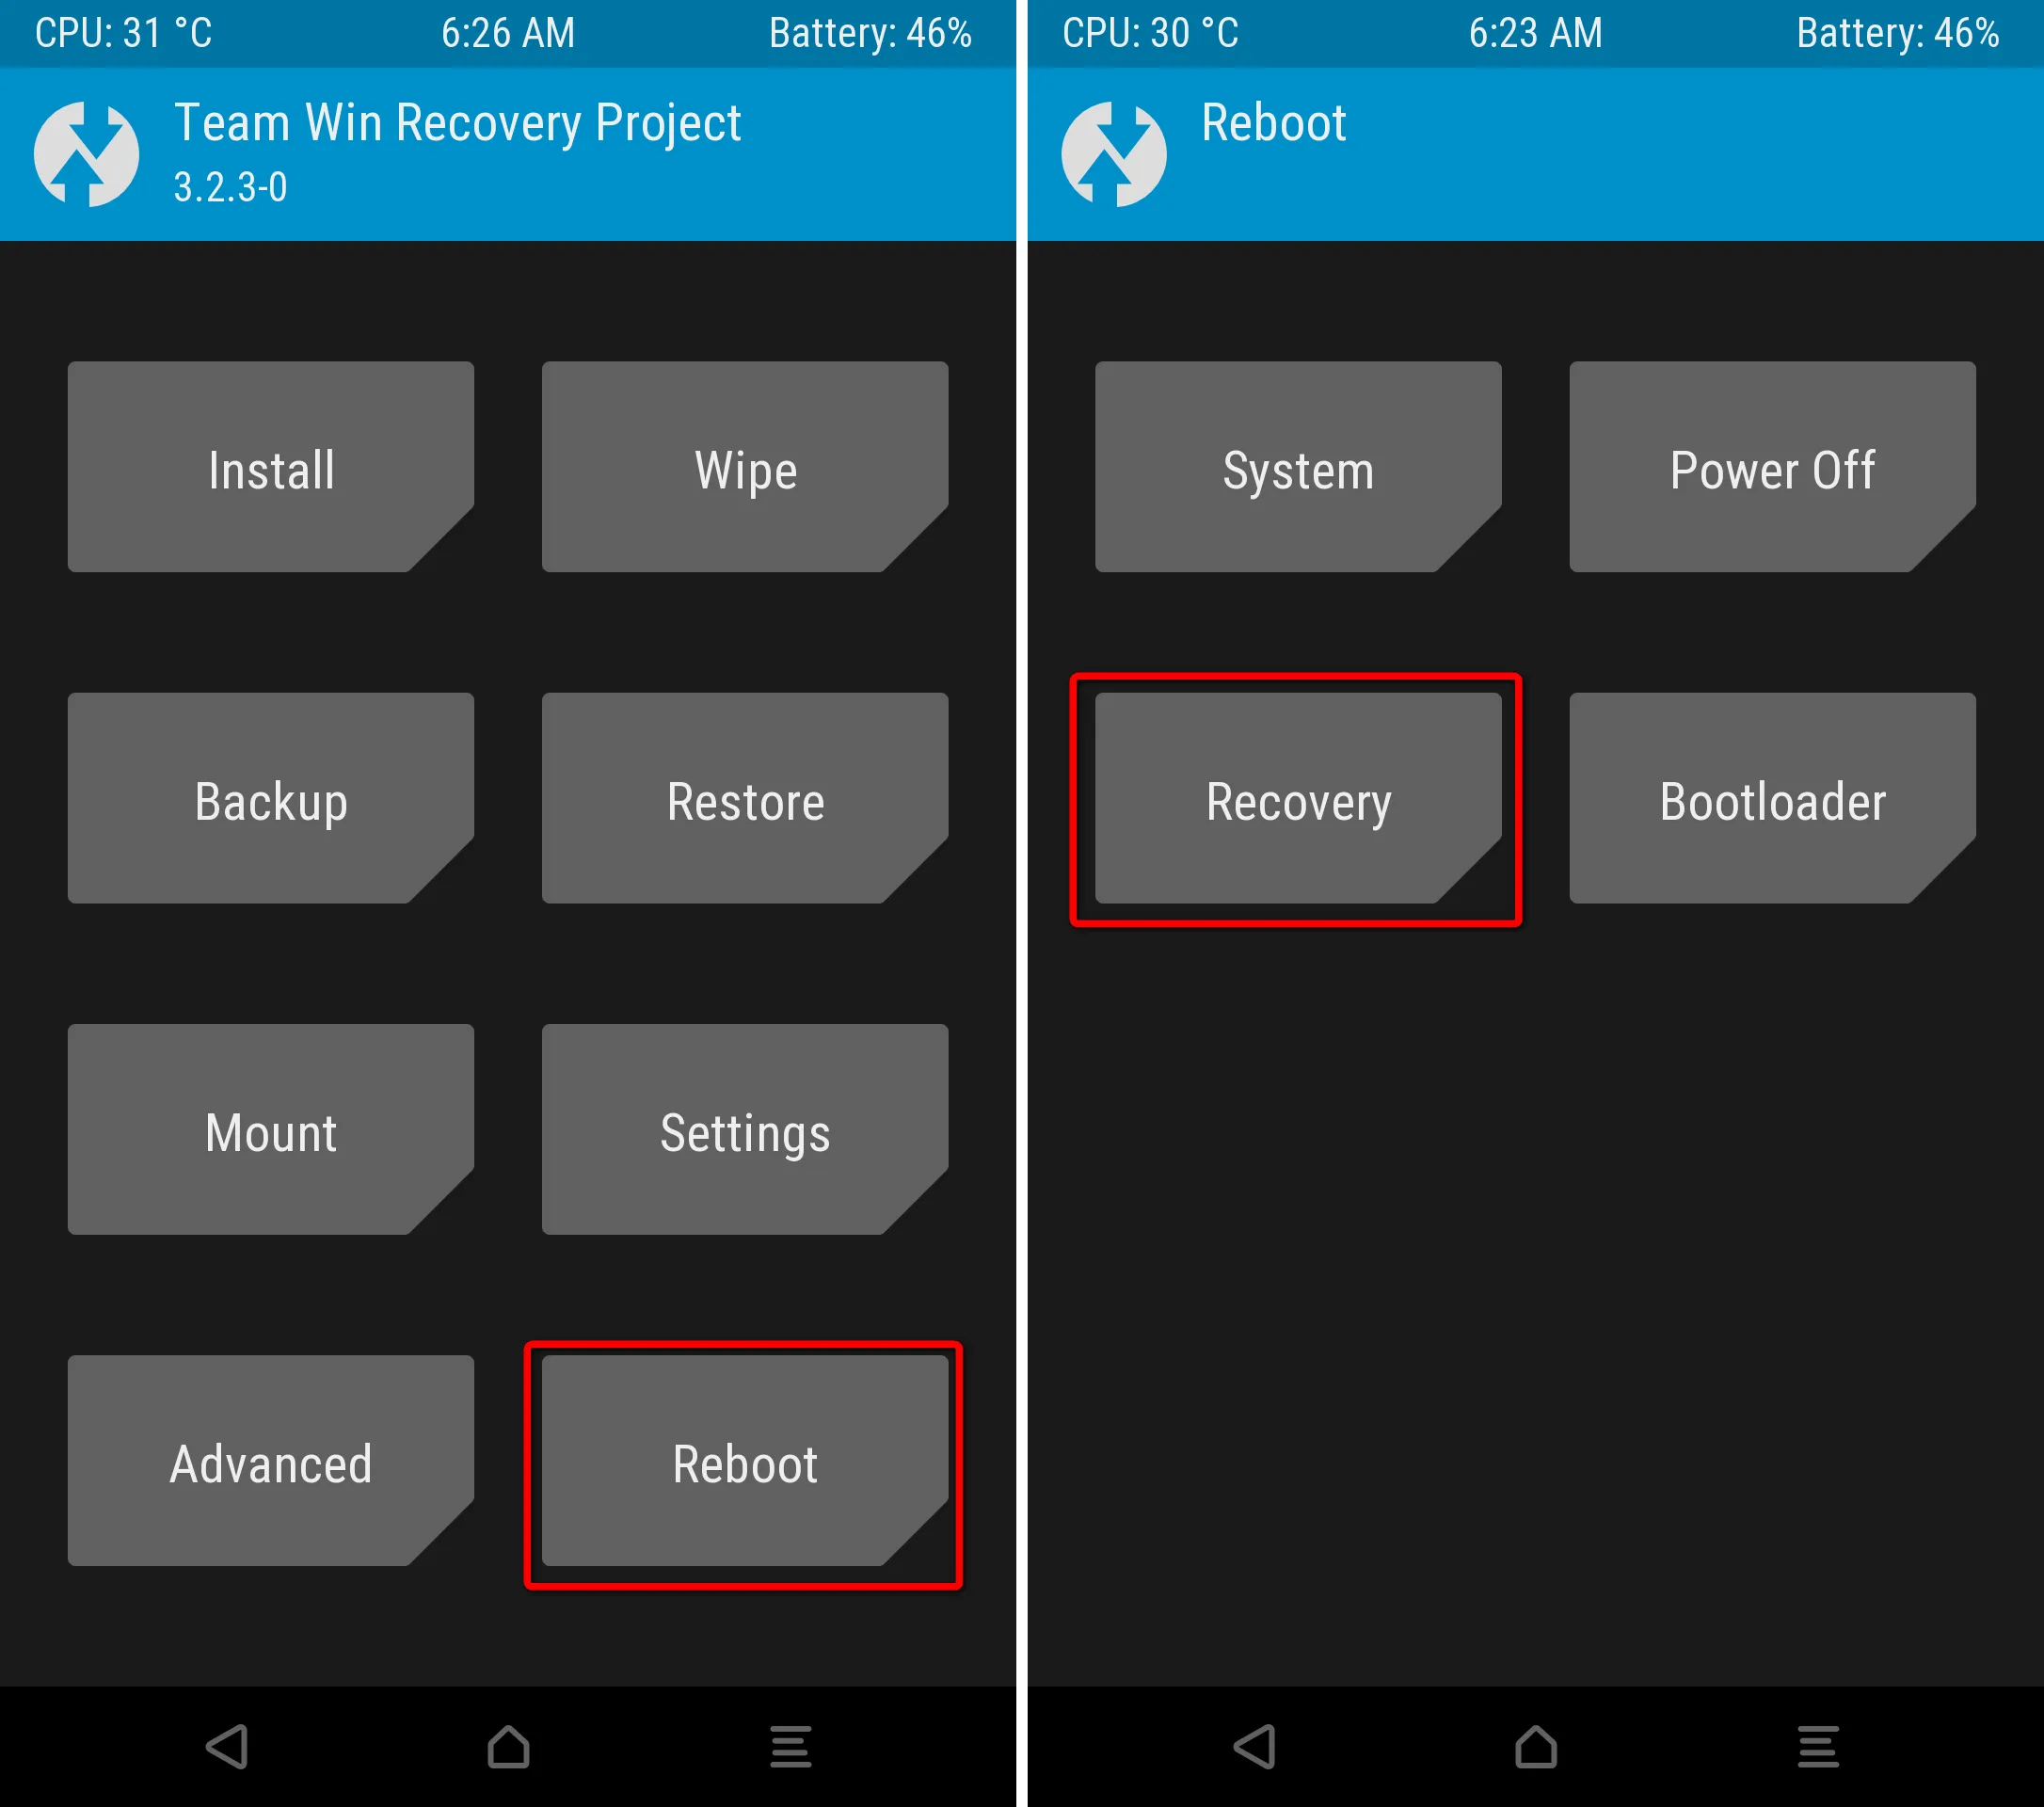
- After the cleaning process, go back to the main menu and click on the Reboot tile, then Recovery and wait for the device to reboot.
- Connect the smartphone to the PC (if you disconnected it) and copy the Magisk archive from the PC to the memory of the device. Point 4 of the preparatory process.
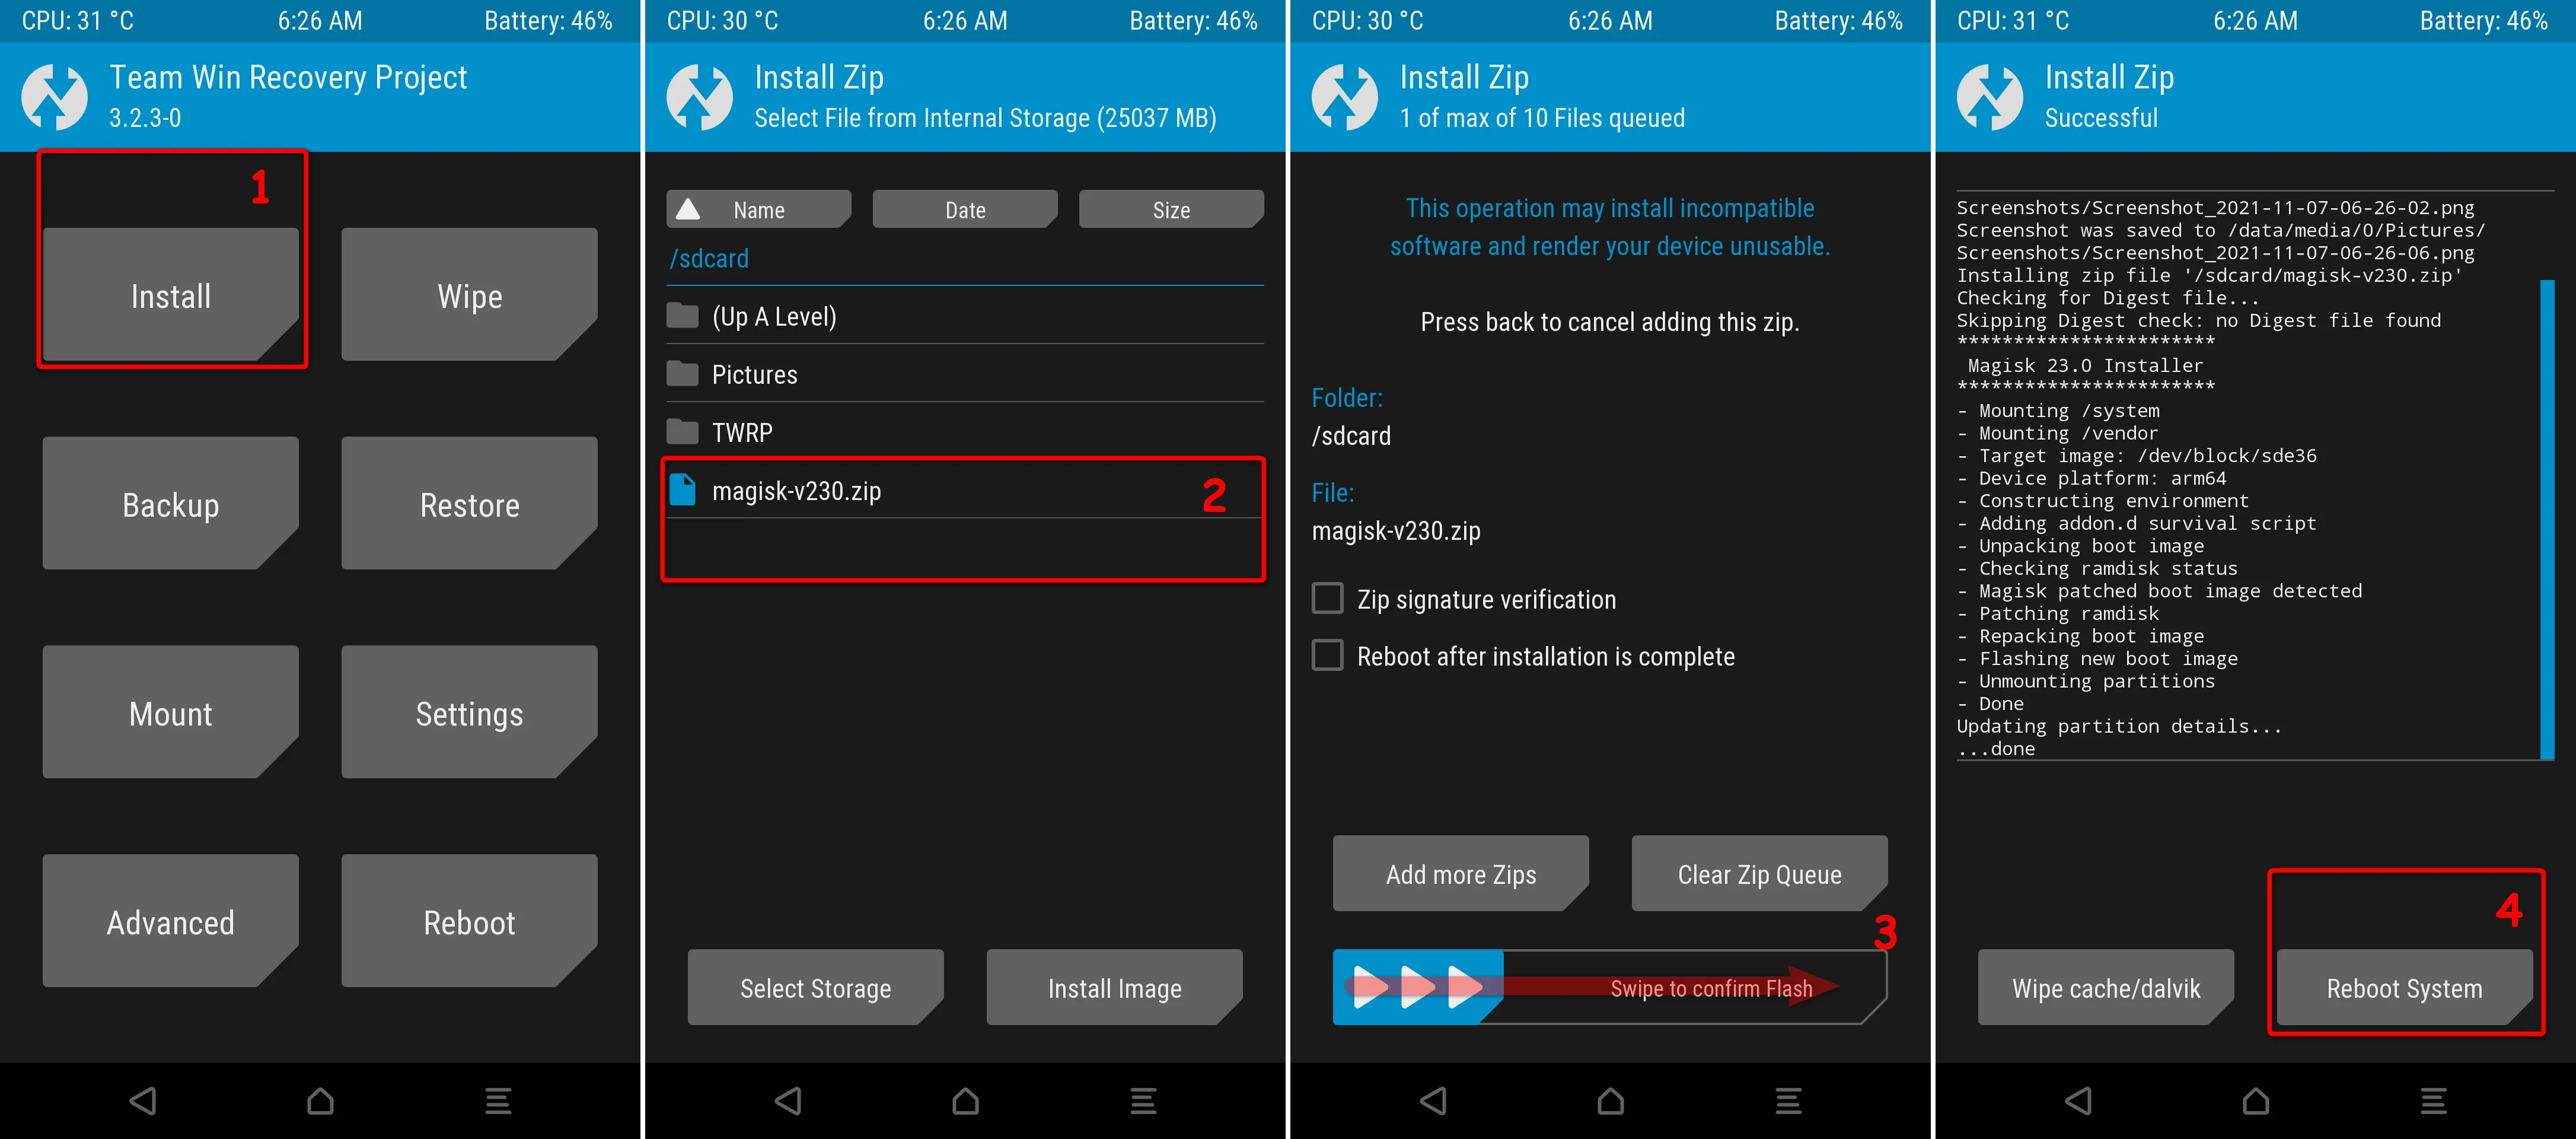
- Return to the phone and select the tile Install, then find the copied archive Magisk and click on it. Swipe from the left side of the screen to the right and wait for the end of the installation process.
- Reboot System button to reboot the OS.
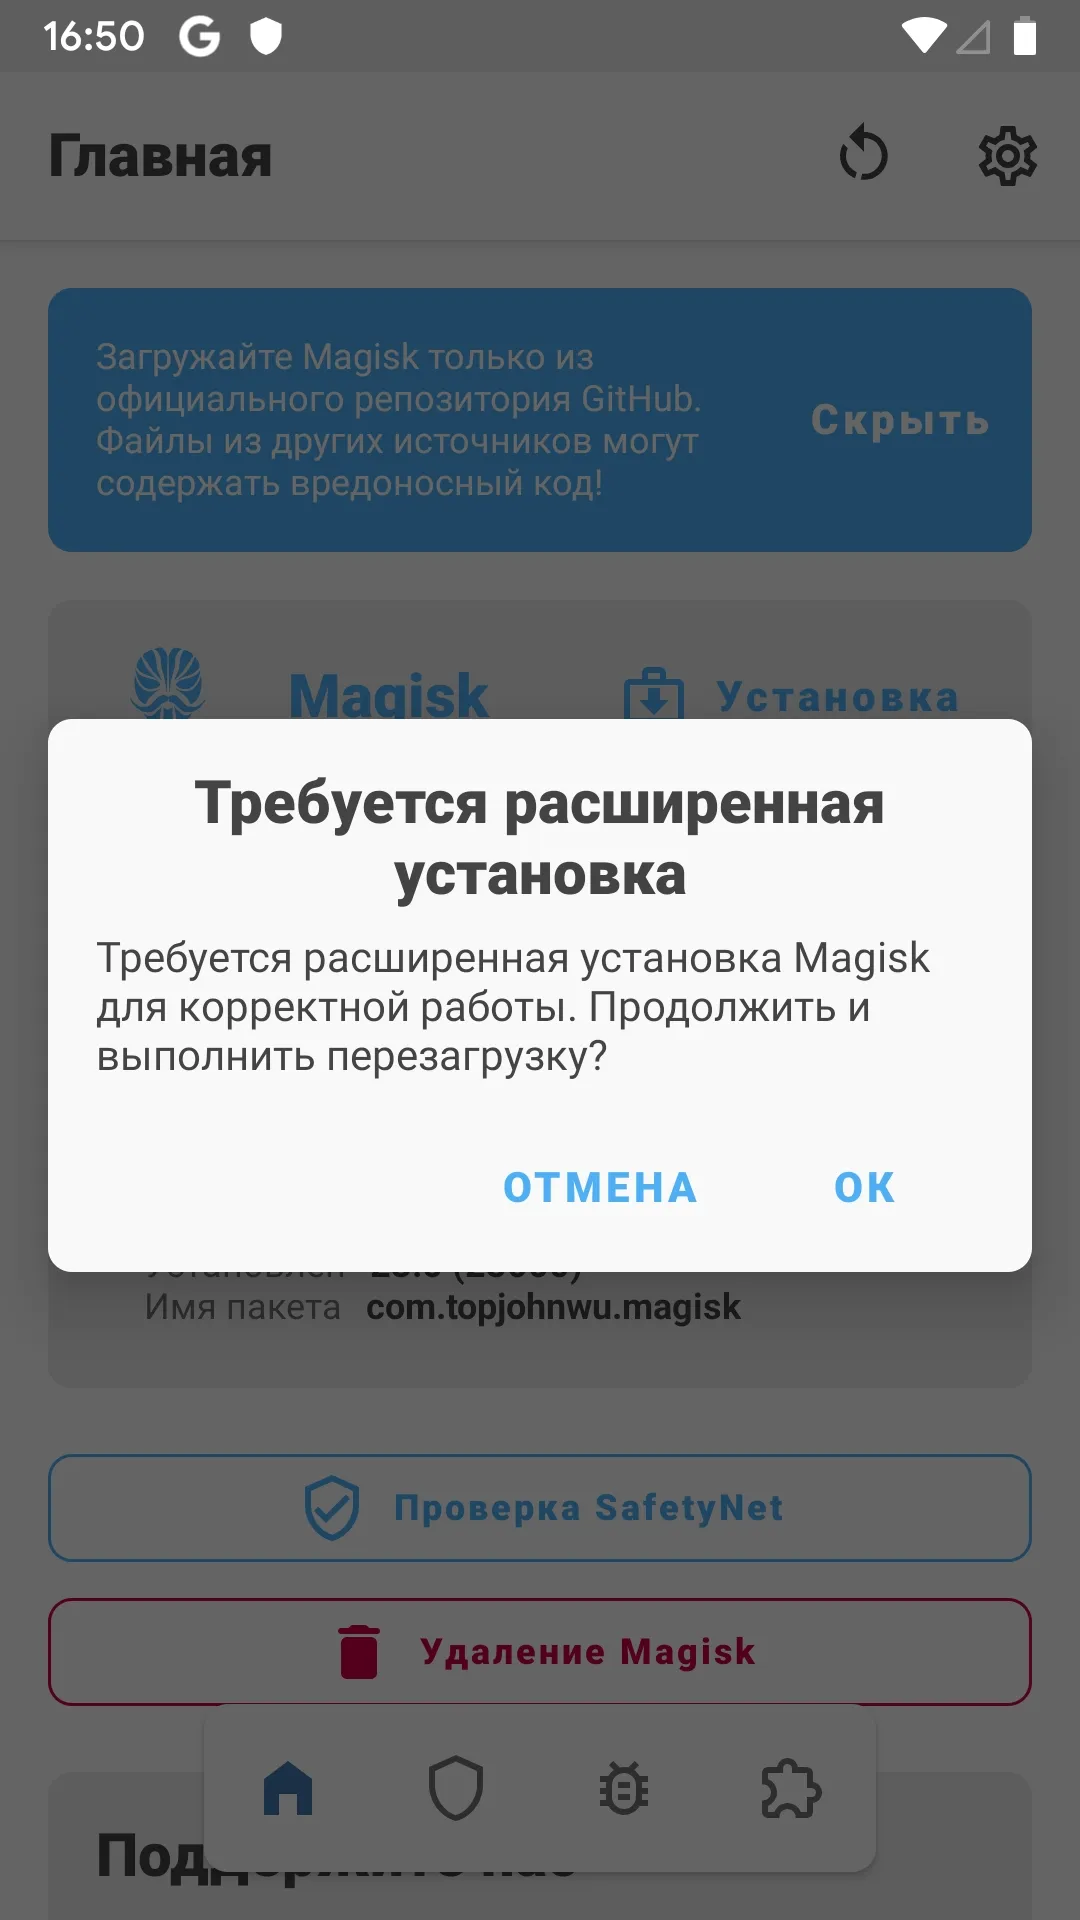
- After starting the device, find Magisk among the installed applications and run it. A window will appear that says you need to perform the advanced installation, click "Ok", the device will reboot.
- After turning it on, you can restart Magisk to make sure it is working.


Похожие Статьи

Manual Root Xiaomi Mi 10T Pro
ROOT
Manual Root Xiaomi Redmi 9
ROOT
How to Root Xiaomi Mi 11 Lite 4G
ROOT
Manual Root Xiaomi Mi 10 Lite
ROOT
Manual Root Xiaomi Redmi 8A
ROOT
How TO Root Xiaomi Mi 10S (manual)
ROOT
Manual Root Xiaomi 9A
ROOT
Manual Root Xiaomi Mi Play
ROOT
Manual How To Root Xiaomi Poco M3
ROOTСomments (0)
 Google
Information
Users of guests are not allowed to comment this publication.
Похожие Статьи
Manual Root Xiaomi Mi 10T Pro
ROOT
Manual Root Xiaomi Redmi 9
ROOT
How to Root Xiaomi Mi 11 Lite 4G
ROOT
Manual Root Xiaomi Mi 10 Lite
ROOT
Manual Root Xiaomi Redmi 8A
ROOT
How TO Root Xiaomi Mi 10S (manual)
ROOT
Manual Root Xiaomi 9A
ROOT
Manual Root Xiaomi Mi Play
ROOT